
NOTE: When removing, installing or replacing corrector servos, check (adjust if necessary) headlight setting. The figures show the replacement of the corrector servo lamp on the left headlight.
NOTE: The left headlight range control servo and the right headlight range control servo are replaced in the same way.
Removing
Switch off the ignition and all electrical consumers, remove the ignition key.
Remove headlight.
Unscrew the bolt 1 and press the drive shaft for adjusting the dipped and main beam height 2 in the direction of the arrow out of the guide (pic. 7.95).
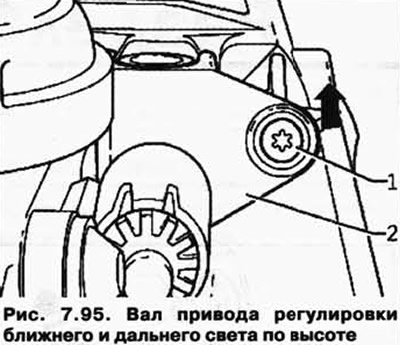
Remove the adjustment drive shaft 2 from the headlight housing.
Press the bracket 1 in the direction of the arrow to the side and remove the cap 2 (pic. 7.96).
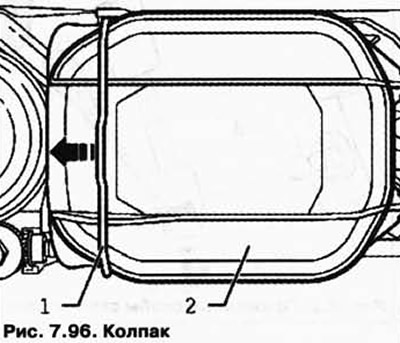
Disconnect plug 3.
Remove fixing screws 1.
Press actuator 2 in the direction of the arrow to pull the ball head of the adjusting shaft sideways out of the ball head mount at the reflector (pic. 7.97).
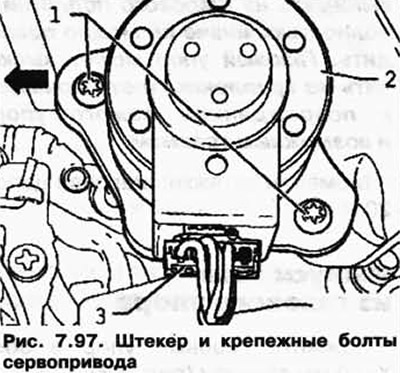
Remove servomotor 2 from headlight housing.
Installation
Installation is carried out in the reverse order, paying attention to the following.
NOTE: When installing, pay attention to the tight fixation of the cap. If water gets inside the headlight, the headlight may be damaged.
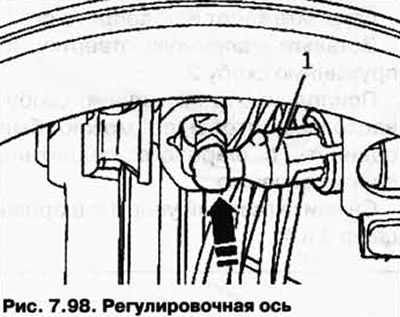
Carefully insert the adjusting shaft of the servomotor 1 into the guide of the ball head (pic. 7.98).
Check the operation of the headlight, including all its functions.
Check the headlight setting and adjust if necessary.
Visitor comments