
If the temperature of the fuel in the fuel filter rises to 10°C, the control valve will switch over and the remaining fuel will flow directly into the fuel tank through the return line. The control valve is located at the top of the fuel filter.
If the engine is at too low a temperature, and as a result of thickening of the fuel it does not start, then sometimes you should:
- remove the fuel filter and heat it in a water bath until the fuel is diluted;
- remove the fuel filter and replace with a new one;
- roll or tow the car into the garage and heat it up there;
- spray the injection system with hot water.
Attention! Never heat up the injection system or the tank with a blowtorch or the like. Explosive!
Checking the heating system and glow plugs
Checking the voltage at the glow plugs
Turbocharged diesel engine (ABL) has a glow system with self-adjusting quick start glow plugs. Heating starts automatically after getting into the car and closing the driver's door, provided that the coolant temperature is below 60°C.
Attention! A faulty heating system is the cause of poor cold starting, especially at outside temperatures below 10°C.
Checking the voltage supply
Test conditions: engine cold (ambient temperature), the battery is charged (above 11.5 V).
1. Connect a voltage indicator to the cable going to the glow plugs and to the chassis (-).
2. Turn the ignition keys to "Vorgluhen" – heating (ignition on).
3. If there is no glow voltage, check the glow plug fuse for damage (small cracks), reliability of fastening and contact.
4. If necessary, clean the contacts, tighten the screws or replace the fuse. The fuse is located in the engine compartment:
- 4-cylinder engine - on the front wall, above the brake booster;
- 5-cylinder engine - on the left wing in the engine compartment.
5. Open the plastic cover with a fuse screwdriver. Fuse current: 4-cylinder engine - 50 A; 5-cylinder engine - 80 A.
Checking current consumption
Checking the amount of current on the glow plugs

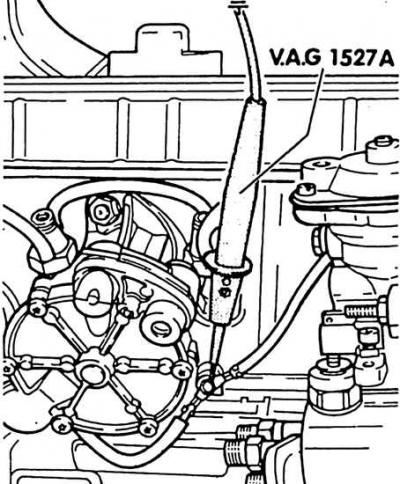
To check the current consumption of each glow plug, factories use a DC clamp ammeter. The clamp captures the insulated cable and the current value is measured by induction.
1. Connect the clamp, if present, to the cable going to the glow plugs.
2. Turn on the ignition, warm up the engine, start and let it idle.
3. During preheating, measure the current consumption with the motor running. The heating time of the glow is about 120 sec (1X engine, AAB) or about 180 sec (ABL engine). The current consumption of each glow plug is approx. 10 A (1X engine, AAB) or about 8 A (ABL engine).
Engine 1X:
- the measured current consumption is about 40 A - the glow plugs are in good condition;
- 30 A - 1 candle is faulty;
- 20 A - 2 candles are faulty;
- 10 A - 3 candles are faulty;
- 0 A - all candles are faulty.
ABL engine:
- the measured current consumption is about 32 A - the glow plugs are in good condition;
- 24 A - 1 candle is faulty;
- 16 A - 2 candles are faulty;
- 8 A - 3 candles are faulty;
- 0 A - all candles are faulty.
AAB engine:
- the measured current consumption is about 50 A - the glow plugs are in good condition;
- at 40 A - 1 candle is faulty;
- 30 A - 2 candles are faulty;
- 20 A - 3 candles are faulty;
- 10 A - 4 candles are faulty;
- 0 A - all candles are faulty.
Attention! Current values are only given for battery voltages greater than 11.5 V.
Determination of faulty candles
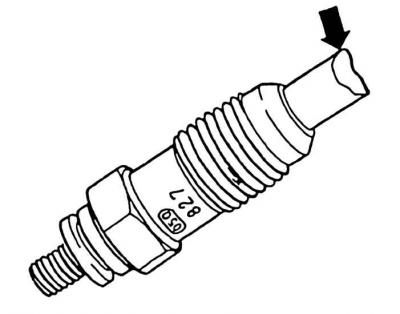
Checking the operation of glow plugs
The arrow points to the glow plug.
1. Unscrew the power supply cable and the busbar.
2. Connect LED indicator to positive () battery pole and apply in series to each glow plug.
3. If the LED is flashing, the glow plug is good.
4. If the LED does not flash, replace the glow plug.
5. Screw the cable to the busbar.
Attention! If no fault is found, but the engine still does not start well, proceed as follows:
- unscrew all nozzles;
- take out the heat insulators;
- turn on the ignition and "Vorgluhen";
- heating;
- observe through the holes of the nozzles which of the candles glow and which do not.
Attention! If the glow plug passes current, this does not mean its impeccable work. Even conductive glow plugs can be faulty.
Glow plugs with burnt glow rods
More often than not, burnt glow plug rods are the result of faulty injectors, not glow plugs.
Burnt glow plug rod
If such candles are found during troubleshooting, it is not enough to simply replace it. It is necessary to check the injectors for injection pressure and tightness (in the factory).
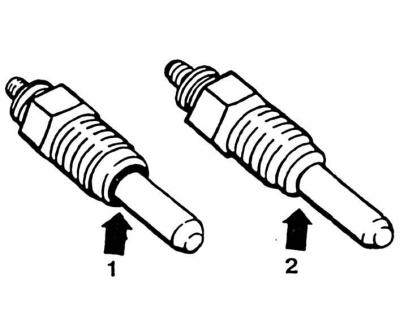
Types of glow plugs
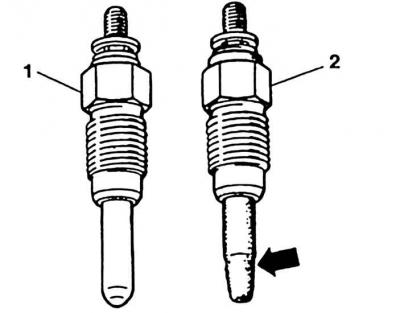
Turbocharged diesel engine (ABL) equipped with new quick start glow plugs (2). They differ in the conical shape of the end of the rod (arrow). They can also be used in other diesel engines. But in turn, ordinary glow plugs (1) cannot be used in a turbocharged diesel engine.
Removing
1. Pull out the radiator.
2. Unscrew the electrical wiring on the glow plugs.
3. Unscrew glow plugs. Before removing the fifth cylinder glow plug, remove the injection lines and the fifth cylinder injector.
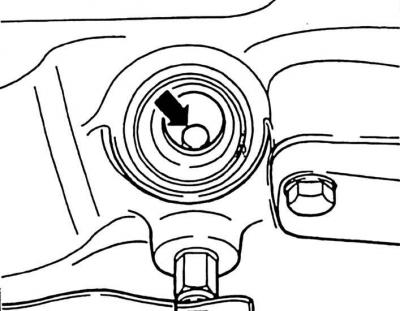
Clearance dimensions between the filament rod and the threaded part
1. The normal size of the ring lumen (0.5 mm); 2. Reduced lumen size
Installation
1. Screw in glow plugs and tighten to 30 Nm.
Attention! Do not exceed tightening torque! Otherwise, the clearance of the ring between the filament rod and the threaded part will decrease. Ring clearance size (see pic. Clearance dimensions between the filament rod and the threaded part) usually 0.5 mm. Reduced gap size leads to premature failure of the glow plug.
2. Screw in the wiring. If removed, install the injector and injection line for cylinder 5.
Visitor comments