
Functional test of the oxygen sensor
1. Connect the VAG 1551 fault code reader (V.A.G 1552) and dial «01» «Engine electronics». The engine must be running at idle. The display should show the following information:
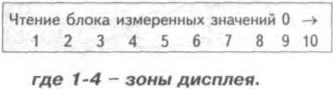
2. Click «08» to select a function «Reading a block of measured values» and confirm by pressing the button «Q». The display should show the following information:
3. Select the desired group. Click «00» for selection «Display group» and confirm by pressing the button «Q». The display should show the following information:
4. Write the data in field 1 (coolant temperature). Specification value: max. 22 (which corresponds to at least 85°C). If necessary, warm up the engine to the correct temperature.
5. Write down the data in field 5 (lambda coefficient). Specification value: between 106-150.
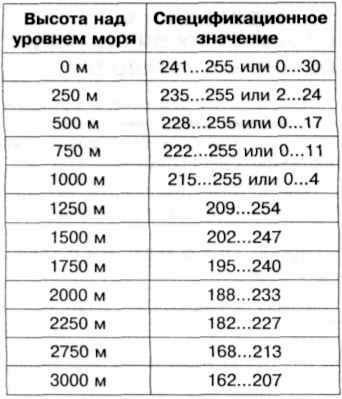
6. Write down the data in field 6 (altitude correction).
7. If the desired value is reached, press «→». Click «06» to select a function «Output Completion» and confirm by pressing the button «Q».
8. If the required value is not reached, check:
- oxygen sensor heater;
- air intake system;
- spark plugs and high voltage wires;
- activated carbon filter solenoid valve;
- the absence of carbon deposits on the oxygen sensor. If necessary, replace the sensor.
Checking oxygen sensor wiring
9. Turn off the ignition.
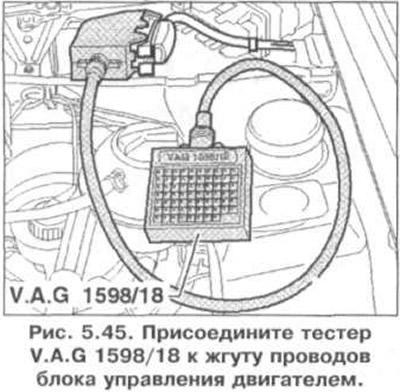
10. Connect the VAG 1598/18 tester to the engine control unit wiring harness (pic. 5.45).
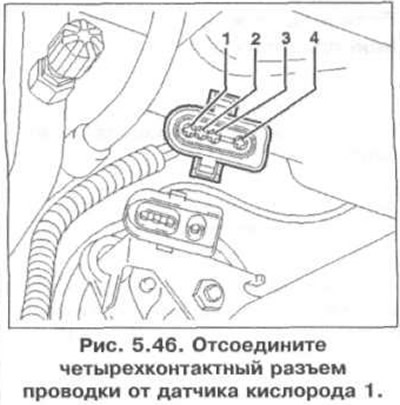
11. Disconnect the four-pin harness connector from the oxygen sensor 1 (pic. 5.46).
12. Check the wires between the tester and the four-pin control unit wiring connector for an open circuit: pin 3 and slot 15, pin 4 and slot 38. Wire resistance: max. 1.5 ohm.
13. In addition, check the wires for shorting one to the other, to «mass» vehicle and to the positive pole of the battery. Specification resistance: ∞ Ohm.
14. If the specification resistance is not reached, check the wiring according to the wiring diagram.
Visitor comments