



Contents: Removal ↓ Installation ↓
Removal
1. Raise the front of the vehicle to relieve weight from the front axle.
2. Loosen the axle shaft mounting nuts.
3. Remove the engine cover.
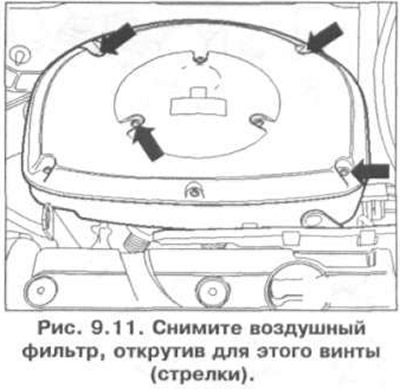
4. Remove the air filter (only on vehicles with oval air filter), by unscrewing the screws (arrows) for this (Fig. 9.11).
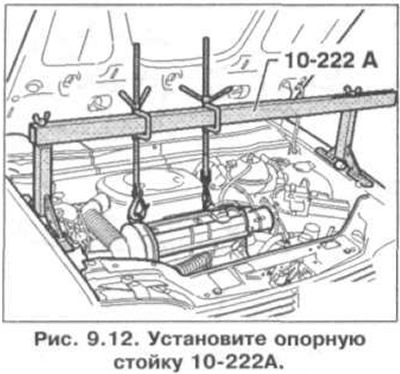
5. Install support stand 10-222A (Fig. 9.12). Raise the engine together with the gearbox.
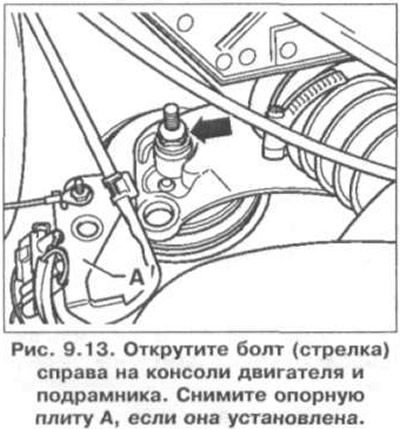
6. Unscrew the bolt (arrow) on the right side of the engine and subframe console (Fig. 9.13). Remove the support plate A, if installed.
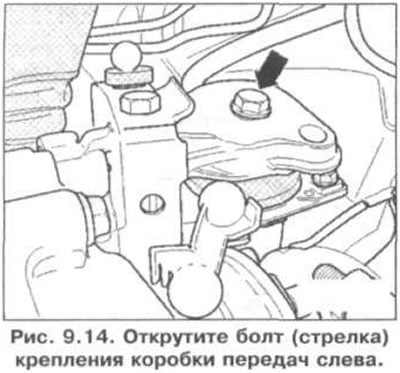
7. Unscrew the bolt (arrow) securing the gearbox on the left (Fig. 9.14).
8. Raise the car.
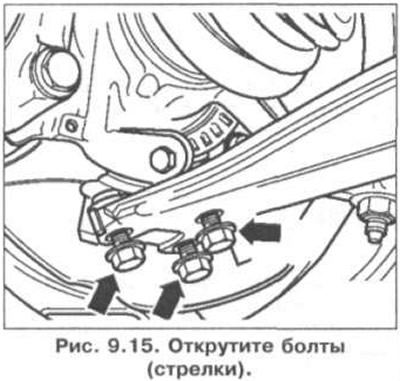
9. Mark the position of the ball joint mounting bolts relative to the lower arm.
10. Unscrew the bolts (arrows) (Fig. 9.15).
11. Turn both wheels outward and lock them in this position (fig. 9.4). If the front exhaust pipe bracket is mounted on the subframe, remove it.
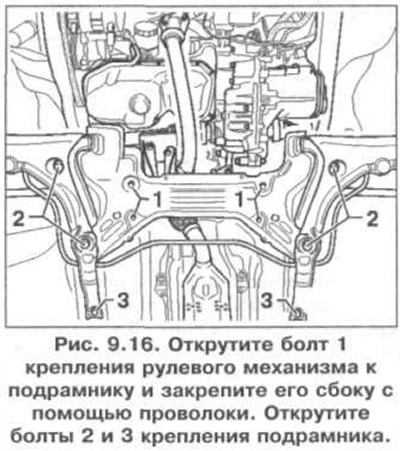
12. Unscrew bolt 1 securing the steering gear to the subframe and secure it to the side with wire (Fig. 9.16). Disconnect the pressure and drain pipes from the clamps on the gearbox. Install the VAG 1383 A lift under the subframe. Unscrew bolts 2 and 3 securing the subframe. Lower the subframe using the VAG 1383 A lift. Bolt tightening torques, Nm: bolts 1 - 30 Nm, bolts 2 - 70 + 90°, bolts 3 - 65 Nm.
13. Make sure the steering gear is disconnected from the subframe.
Installation
14. Installation is carried out in the reverse order of removal.
Visitor comments