



1. Rotate the joint hub and ball race.
2. Remove the ball race from the hub (arrow) (Fig. 9.34).
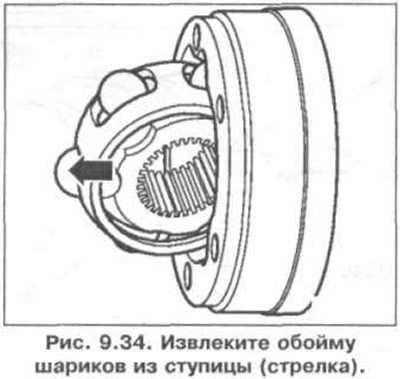
3. Press the balls out of the cage.
4. Rotate and install the collar so that it fits into the hub grooves (arrows) (Fig. 9.35).
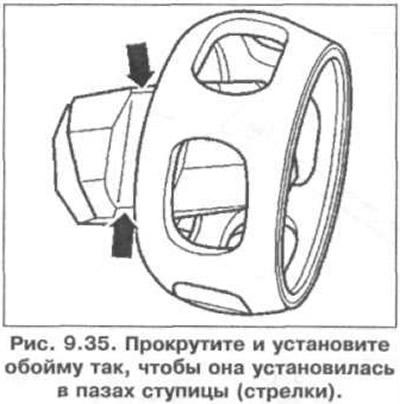
5. Check the joint housing, cage and balls for tarnish and signs of wear. If excessive clearance is observed under variable load on the joint, the joint must be replaced.
Installation
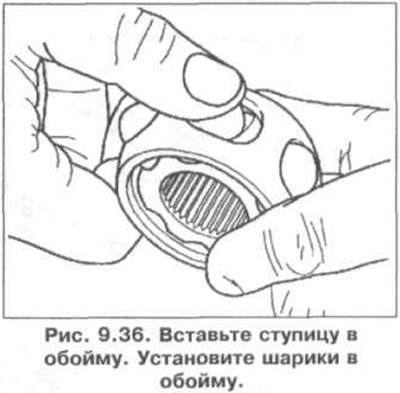
6. Insert the hub into the cage (Fig. 9.36). It can be installed in any position. Install the balls into the cage.
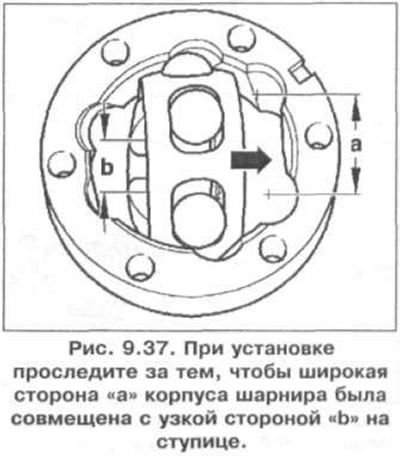
7. Install the hub with the balls into the joint housing. When installing, make sure that the wide side "a" of the joint housing is aligned with the narrow side "b" on the hub (Fig. 9.37). The chamfer on the inside of the hub (on the splined part) should be directed towards the larger diameter of the hinge housing.
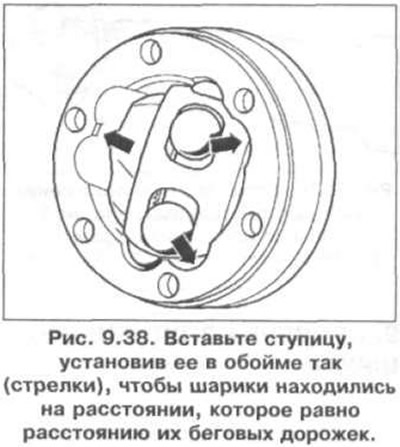
8. Insert the hub, installing it in the cage so (arrows) that the balls are at a distance equal to the distance of their raceways (Fig. 9.38).
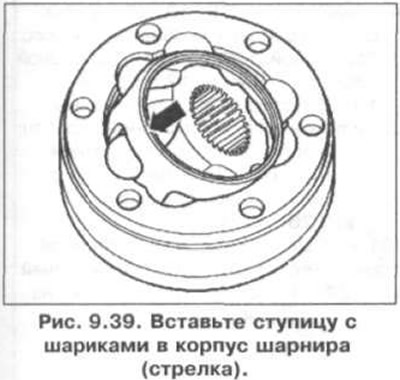
9. Insert the hub with balls into the joint housing (arrow) (Fig. 9.39). The joint is installed correctly if the hub can be moved back and forth by hand.
Visitor comments