
- dismantle the indicator.
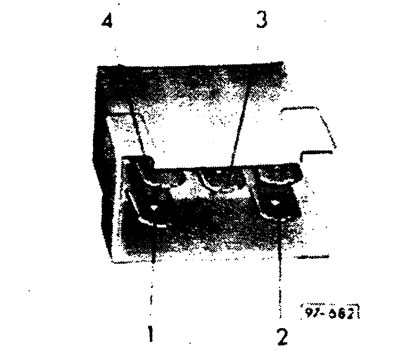
- (97-682) connect the device to a charged 12 V car battery. Red wire 1 - to the positive pole, black wire 2 - to the negative.
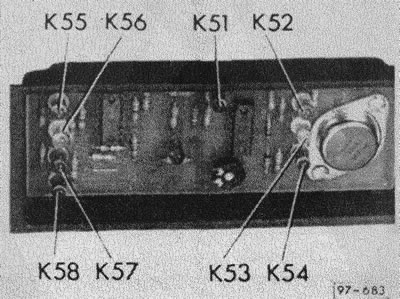
- (97-683) the K51 ready-to-work indicator lamp and the K52 battery charge indicator lamp above the 12.5 V indicator should light up.
- load the battery on the battery tester with a consumption current of not more than 110 A. When the battery is discharged, the green LED K52 should light up first, then the yellow K53 and, finally, the red K54. Already at a battery voltage of 12 V, the red LED should light up.
- if one of the diodes does not light up during the test, replace the indicator device.
2. Check the indicator lamps for filling the water tank.
- dismantle the indicator.
- connect the red conductor 1 of the device to the plus of the car battery, and the black conductor 2 to the minus.
- connect the green conductor of the new water tank sensor to the green conductor 3. The red LED K58 should light up.
- connect the test lead to the negative of the battery and alternately touch the white, yellow and green conductor of the water tank sensor. In this case, LEDs K57, K5b and K55 should light up one after another.
- if during the test one of the diodes does not light up, the indicator device with control lamps must be replaced.
Visitor comments