



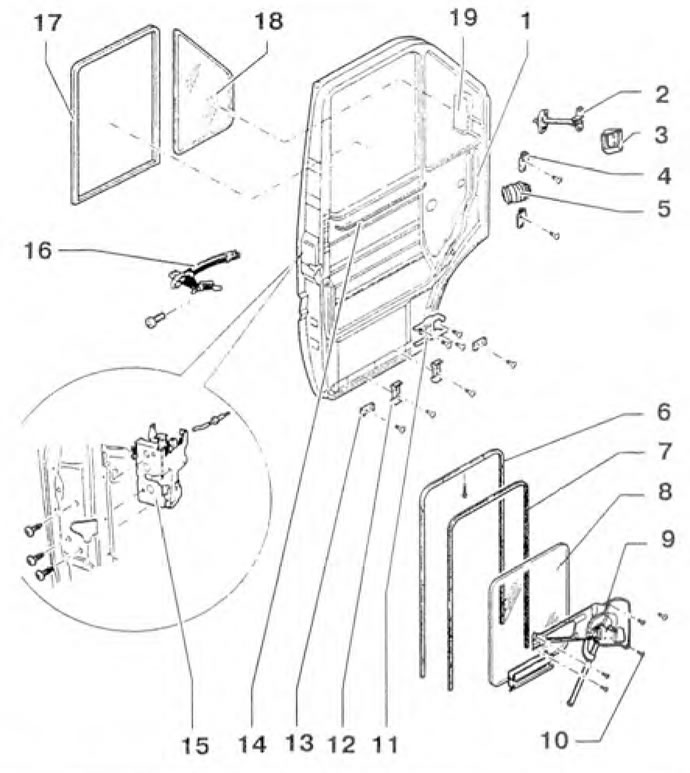
Figure 10.12. Front door: 1 - Front door; 2 - Door stop; 3 - Door limiter cover; 4 - Door hinge; 5 - Protective sleeve; 6 - Window channel; 7 - Window channel profile; 8 - Door glass; 9 - Window lifter; 10 - Screws; 11, 12 - Brackets; 13 - Loop; 14 - Glass groove seal; 15 - Door lock; 16 - Door opening handle; 17 - Glass edging; 18 - Glass.
Installation and adjustment
1. Install the door on the hinges.
2. Screw in the 2 screws that secure the doors to the hinges (figure 10.13). Adjust the door by loosening screws 1 and moving it relative to the hinges. Tightening torque of screws: 25 Nm.
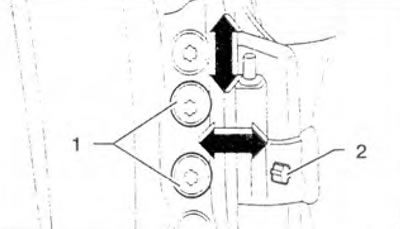
Figure 10.13. Screw in screws 2 to secure the doors to the hinges. Adjust the door by loosening screws 1 and moving it relative to the hinges.
3. The front door is correctly adjusted when the distances a and b are correct around the entire perimeter of the door (arrow) (figure 10.14).
Gaps: a = 7±0.5 mm, b = 8±0.5 mm.
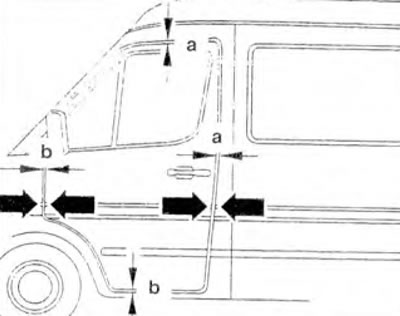
Figure 10.14. The front door is correctly adjusted when the distance around the entire perimeter of the door is the same (arrow).
Visitor comments